Want to build a fast and reliable online store with WordPress? Setting up WooCommerce with a lightweight WordPress theme gives you a solid foundation for creating a professional ecommerce website without adding unnecessary bloat. With the right theme, optimized hosting, and a few essential settings, you can create a store that looks great while remaining fast and easy to manage.
WooCommerce provides the core ecommerce functionality, while your WordPress theme controls much of the store’s visual presentation and frontend experience. Choosing a lightweight theme can help reduce unnecessary CSS, JavaScript, animations, and other resources that may slow down your website.
In this guide, we’ll walk through how to set up WooCommerce with a lightweight WordPress theme and share practical tips for creating a fast, flexible, and conversion-friendly online store.
Why Choose a Lightweight WordPress Theme for WooCommerce?
A WooCommerce store can quickly become resource-intensive. Product images, shopping cart functionality, payment gateways, third-party scripts, analytics, plugins, and marketing tools can all add requests and page weight.
A lightweight WordPress theme starts with a simpler foundation. Instead of loading large amounts of functionality that your store may never use, it focuses on the essential structure required to present your products effectively.
✨ Benefits of a Lightweight WooCommerce Theme:
- Faster page loading and better frontend performance
- Less unnecessary CSS and JavaScript
- Better compatibility with WooCommerce
- More flexibility for customization
- Improved mobile shopping experience
- Easier performance optimization
- Better foundation for Core Web Vitals
The goal is not simply to choose the theme with the fewest files. A good lightweight theme should still provide the layouts, typography controls, product templates, and customization options required by your store.
What You Need Before Setting Up WooCommerce
Before installing WooCommerce, make sure your WordPress website has a suitable hosting environment, an SSL certificate, and a lightweight theme that supports WooCommerce.
You should also prepare the basic information for your store, including:
- Store name and business information
- Currency and tax settings
- Shipping zones and delivery methods
- Payment methods
- Product images and descriptions
- Product categories and attributes
- Privacy, refund, and shipping policies
Starting with these details makes the WooCommerce setup process much smoother and reduces the need to change important settings later.
Step 1: Install WooCommerce
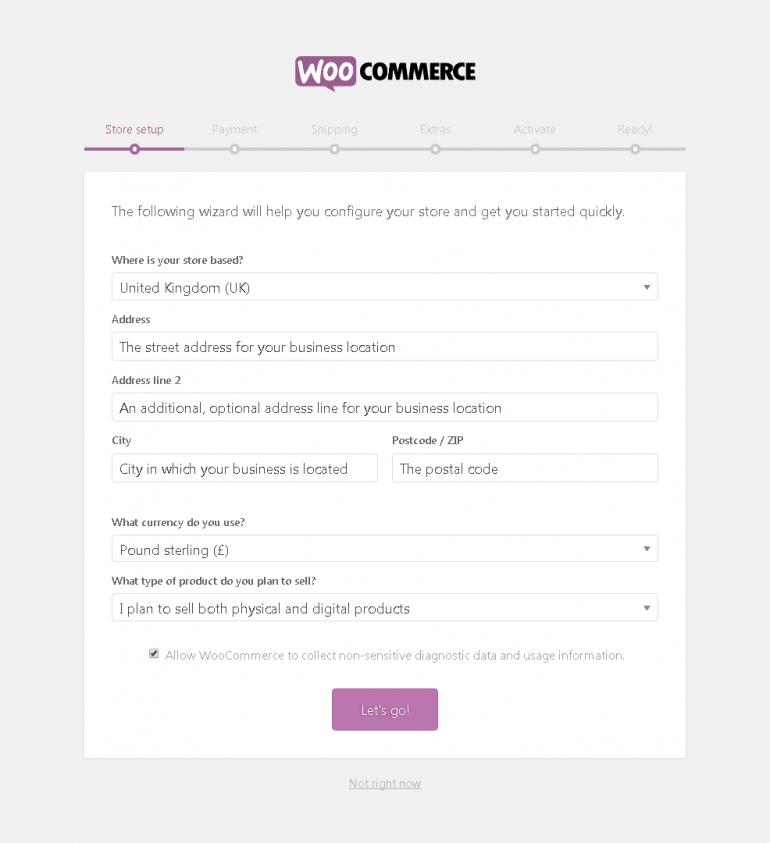
From your WordPress dashboard, go to Plugins > Add New Plugin and search for WooCommerce. Install and activate the official WooCommerce plugin.
WooCommerce will guide you through its initial setup process. Depending on your version and configuration, you may be asked to provide information about your store location, currency, product type, payments, shipping, and taxes.
You do not need to configure every advanced option immediately. Start with the essential store settings and return to more advanced configurations once your basic store is working correctly.
Step 2: Choose and Activate a Lightweight Theme
After WooCommerce is installed, choose a lightweight WordPress theme that is designed to work well with WooCommerce.
When evaluating a theme, look beyond its demo appearance. A visually impressive demo may contain sliders, animations, large images, third-party scripts, and multiple plugins that you do not actually need.
Instead, check whether the theme provides:
- Clean and optimized frontend code
- WooCommerce compatibility
- Responsive product and shop layouts
- Flexible header and footer options
- Customizable typography and colors
- Compatibility with your preferred page builder
- Regular updates and documentation
A lightweight theme should give you enough control to create a unique store without forcing unnecessary features onto every page.
Step 3: Configure Your Shop and Product Pages
WooCommerce automatically creates important pages such as the Shop, Cart, Checkout, and My Account pages. Review these pages after installation and make sure they are correctly assigned under your WooCommerce settings.
Next, configure your product catalog.
For each product, add a clear title, detailed description, price, product image, gallery images, category, and relevant attributes. If you sell variable products, configure variations such as size, color, or other product options.
Keep your product pages simple. Avoid adding unnecessary widgets, popups, animations, or scripts that can distract customers and increase page weight.
Step 4: Configure Payments, Shipping, and Taxes
A professional WooCommerce store needs a reliable checkout process. Go through your payment settings and enable only the payment methods your customers actually use.
For shipping, create shipping zones based on the locations you serve. You can then assign appropriate shipping methods and rates to each zone.
Tax configuration depends on your business location and applicable regulations. Configure WooCommerce according to your local requirements and verify the final prices displayed during checkout.
Before launching, place a test order and verify the complete process from product selection to payment confirmation.
Step 5: Optimize Images and Store Performance
WooCommerce stores are naturally image-heavy, making image optimization one of the most important WordPress site speed tips for ecommerce websites.
Large product images can increase page weight significantly, especially on category pages containing many products.
✨ WooCommerce Performance Tips:
- Resize product images before uploading them
- Use WebP or AVIF where appropriate
- Compress product and gallery images
- Use responsive image sizes
- Lazy-load images below the initial viewport
- Avoid unnecessary product sliders
- Enable page and browser caching
- Use a CDN when appropriate
Pay particular attention to the images displayed above the fold. Your main product or hero image should be loaded efficiently because it can have a direct impact on the perceived loading speed of the page.
Step 6: Keep WooCommerce Plugins Under Control
WooCommerce is highly extensible, which is one of its biggest advantages. However, installing too many plugins can eventually affect performance, security, maintenance, and compatibility.
Before installing a plugin, consider whether you actually need its functionality. If a feature can be implemented efficiently without adding another large plugin, that may be the better option.
Also avoid installing multiple plugins that perform the same task. This is particularly important for caching, image optimization, SEO, security, and page builders.
Regularly review your installed plugins and remove those that are no longer required.
Step 7: Test Your Store Before Launch
Once your WooCommerce store is configured, test it from the perspective of a real customer.
- Open the homepage on mobile and desktop
- Browse product categories
- Open individual product pages
- Add products to the cart
- Update cart quantities
- Complete the checkout process
- Test payment and shipping options
- Check confirmation emails
- Verify navigation and search
You should also run your key pages through performance testing tools such as PageSpeed Insights and GTmetrix. Test the homepage, shop page, category pages, product pages, and checkout rather than testing only the homepage.
Case Study: A Faster WooCommerce Store
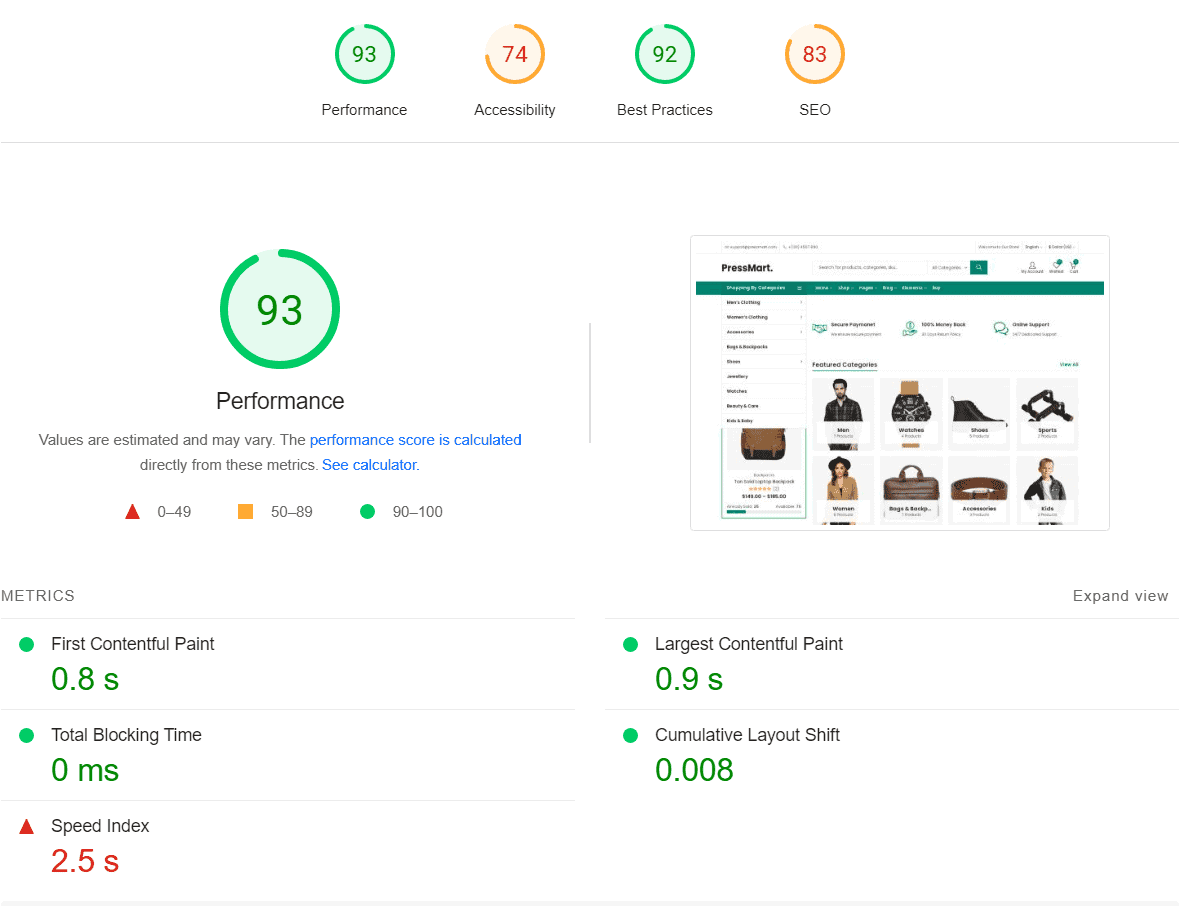
Consider a WooCommerce store using a multipurpose theme with several visual effects, large product images, multiple plugins, and external scripts.
The original store may load a large number of assets before the main content becomes interactive. Instead of replacing the entire website, the owner can start by switching to a lightweight WordPress theme and removing unnecessary functionality.
Product images can then be compressed and converted to modern formats. Unused plugins can be removed, caching can be enabled, and non-critical JavaScript can be deferred.
A potential improvement could look like this:
| Metric | Before | After |
|---|---|---|
| Page Load Time | 4.8s | 2.3s |
| Page Size | 5.2 MB | 2.1 MB |
| Requests | 158 | 91 |
| LCP | 4.1s | 2.2s |
These figures are illustrative rather than guaranteed results. Actual performance depends on hosting, theme architecture, plugins, product images, traffic, and other factors.
The important point is that ecommerce performance is usually improved through a combination of small, measurable changes rather than one single optimization.
Final Thoughts
Setting up WooCommerce with a lightweight WordPress theme gives you a strong foundation for building a fast and flexible online store. WooCommerce provides the ecommerce functionality you need, while a lightweight theme can help keep the frontend clean and efficient.
Start with the essentials: install WooCommerce, configure your store, choose a well-built theme, optimize product images, limit unnecessary plugins, enable caching, and test the complete shopping experience.
If performance is a priority, avoid adding features simply because they are available. Every slider, animation, plugin, font, and third-party script should have a clear purpose.
The best WooCommerce website is not necessarily the one with the most features. It is the one that gives customers a smooth shopping experience while remaining fast, stable, easy to maintain, and easy to grow.