Almost every WordPress site collects some personal data: contact form messages, comments, newsletter sign-ups, analytics. A privacy policy tells visitors what you collect and why; a cookie notice, where the law requires one, asks for consent before non-essential cookies are set. WordPress has built-in tools for the first, and plugins handle the second.
This guide shows how to use the built-in privacy tools, what to put in the policy, and how to approach cookie consent. Screenshots come from a WordPress 7.1.3 test site.
This isn’t legal advice. Privacy rules depend on where you and your visitors are, and on what your site does. Use this guide to prepare, and ask a privacy professional if you handle sensitive data, sell online or target visitors in several countries.
Step 1: Set up the privacy policy page
WordPress creates a draft Privacy Policy page when it is installed. To connect it, or create a new one, go to Settings › Privacy:
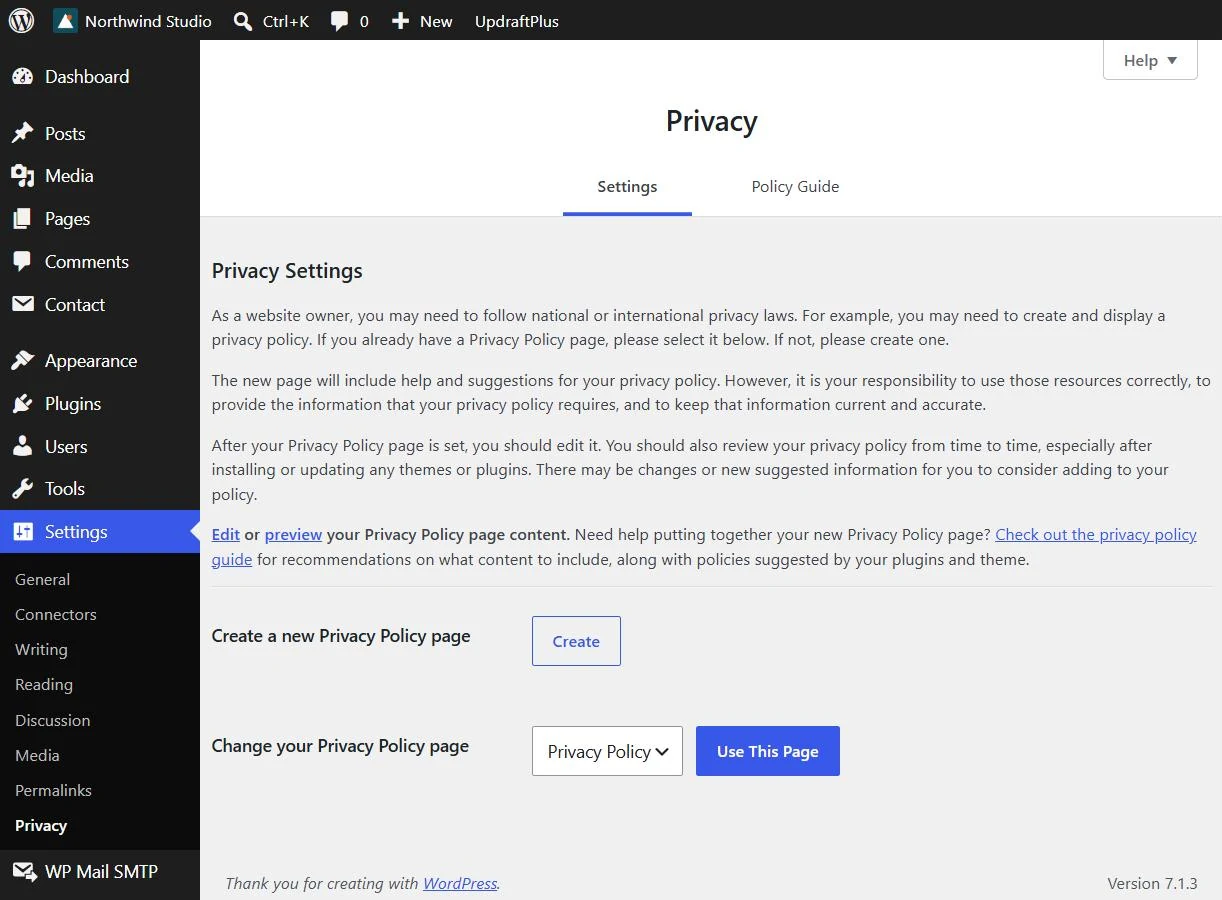
- Create a new Privacy Policy page generates a draft with suggested headings and guidance.
- Change your Privacy Policy page lets you choose an existing page, such as the draft WordPress created.
Once a page is selected, WordPress links it from the login screen and makes it available to themes, which often show it in the footer. Your theme may also add it to the comment form or other places.
Step 2: Use the Policy Guide
Switch to the Policy Guide tab:
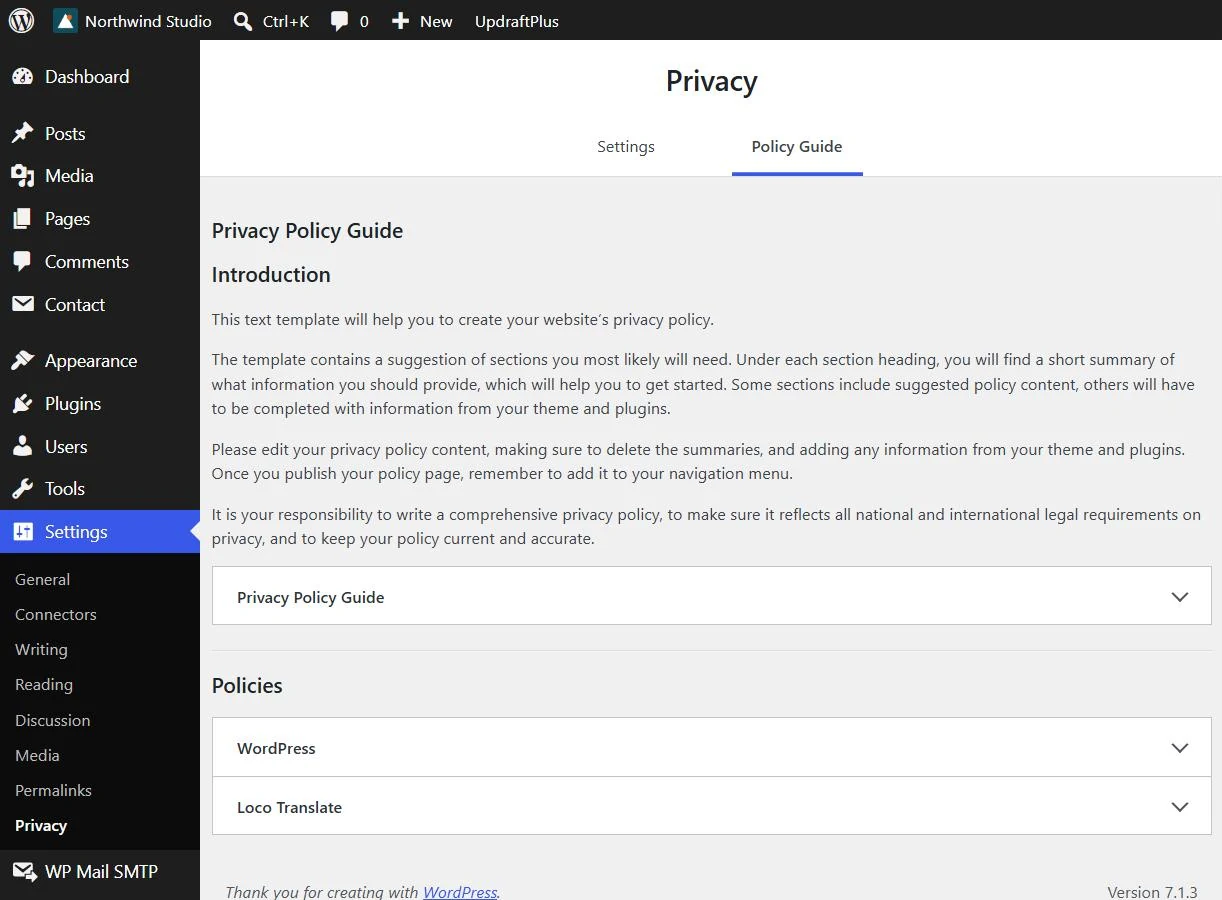
The guide contains WordPress’s own suggested text plus sections added by plugins that collect data. On our test site it shows sections for WordPress and for Loco Translate. On a real site you may see sections for your form, shop, analytics or newsletter plugins. Plugins don’t always add one, so don’t treat the list as complete.
Use the guide as a checklist, not a finished policy. Copy what applies, rewrite it in your own words and delete what doesn’t.
Step 3: Write the policy
A useful privacy policy answers these questions in plain language:
| Section | What to cover |
|---|---|
| Who you are | Business name, address, contact email for privacy questions |
| What you collect | Form fields, comments, account data, orders, analytics data, cookies |
| Why | The purpose for each kind of data, and, under GDPR, the legal basis |
| Who else receives it | Hosting, email delivery, analytics, payment, newsletter and booking services |
| Where it is processed | Countries outside the visitor’s own, if relevant |
| How long you keep it | For example, form messages deleted after 12 months |
| Visitors’ rights | Access, correction, deletion, objection, and how to ask |
| Cookies | What you use and how to change consent; often a separate cookie policy |
| Changes | When the policy was last updated |
Two things make policies more accurate:
- List your actual tools. Go through your plugins and embedded services (maps, videos, fonts loaded from third-party servers, chat widgets). Each one may collect data.
- Match retention to reality. If your form plugin stores every submission forever, either change that setting or say so.
If your site handles health information, such as a clinic’s booking form, take extra care; our clinic website guide covers the specifics.
Step 4: Know what WordPress itself stores
Out of the box, WordPress:
- stores the name, email and IP address of people who comment;
- can set cookies that remember a commenter’s name and email, but only if they tick the consent box below the comment form;
- sets login cookies for users who log in;
- stores data about embedded media and uploads in your database.
Contact forms are another common source of personal data. Contact Form 7, for example, sends submissions by email by default rather than storing them in the database, unless you add a plugin that stores them. Our Contact Form 7 guide covers setup.
Step 5: Handle data requests
WordPress has tools for visitors’ privacy requests under Tools › Export Personal Data and Tools › Erase Personal Data. You enter the person’s email address, WordPress sends them a confirmation email, and once confirmed you can export or erase the data WordPress and compatible plugins hold about them. Confirm requests before acting on them, and keep a simple record of what you did.
Step 6: Decide whether you need a cookie notice
Not every cookie needs consent. A rough way to sort them:
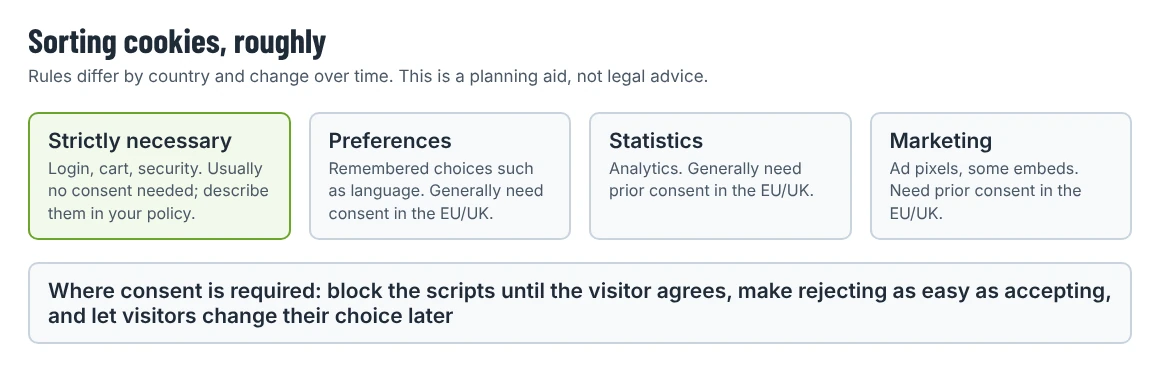
- Strictly necessary cookies (login, shopping cart, security) generally don’t need consent, though you should still describe them.
- Preferences, statistics and marketing cookies, such as analytics, advertising pixels and some embedded videos, generally need prior consent for visitors in the EU and UK.
- Other jurisdictions, including several US states, use different models, often based on notice and a way to opt out of the sale or sharing of data.
If you use only strictly necessary cookies, a mention in your privacy policy may be enough. If you use analytics or advertising tags for visitors where consent is required, you need a consent tool that blocks those scripts until the visitor agrees. A banner that only says “we use cookies” without blocking anything doesn’t meet that requirement.
Step 7: Add a consent plugin
Cookie consent plugins scan your site for cookies, show a banner, block scripts until consent is given and record consent. Widely used options on WordPress.org include Complianz and CookieYes, each with 1,000,000+ active installations as of 20 October 2026.
When you set one up:
- Run its cookie scan and check the results against your own list of tools.
- Configure the banner so that Reject is as easy to find as Accept where the law expects it.
- Make sure scripts are actually blocked before consent. Open the site in a private window, don’t click anything, and check in your browser’s developer tools that analytics or ad requests aren’t sent.
- Add a link where visitors can change their choice later, often in the footer.
- If you use Google Analytics or Google advertising tags, check Google’s current consent requirements for visitors from the European Economic Area and the UK, and whether your consent plugin supports them.
Keep it current
- Review the policy when you add a plugin, form, tracking script or embedded service.
- Update the “last updated” date when you change it.
- Recheck the cookie scan a few times a year.
Privacy settings belong with your other first-week checks; our WordPress security basics covers the rest.