Switching themes doesn’t delete your posts or pages. WordPress keeps content in the database, separate from the theme. What you can lose is everything the old theme was responsible for: its settings, its widget layout, its shortcodes, sometimes your tracking code. Most “I lost everything after changing themes” stories are really “I lost the parts that belonged to the theme, and nobody wrote them down first.”
This guide shows what stays, what doesn’t, and a step-by-step process for switching safely. Screenshots come from a WordPress 7.1.3 test site.
What stays and what changes
| Stays when you switch | Needs checking or redoing |
|---|---|
| Posts, pages, comments, categories and tags | Customizer settings (colors, layout options, header settings), which are saved per theme |
| Media Library files | The logo set in the Customizer, also saved per theme |
| Users and roles | Additional CSS added in the Customizer, which is saved per theme too |
| Plugin data and settings | Widgets: WordPress tries to match them to the new theme’s areas; the rest go to Inactive Widgets |
| Settings › General, Reading and Permalinks | Menu locations: menus stay, but you must assign them to the new theme’s locations |
| Site title, tagline and site icon | Shortcodes provided by the old theme, which will show as plain text |
| Page builder layouts, as long as the builder plugin stays active | Custom post types registered by the theme (portfolio, team, services), which disappear from the dashboard |
Code in the old theme’s functions.php or theme options (tracking scripts, custom functions) |
|
| Template changes made in the Site Editor, which belong to the block theme they were made in |
Content in custom post types isn’t deleted when the theme that registered them is deactivated. It is still in the database, just not visible. Reactivating the theme, or registering the same post type with a plugin, brings it back.
Before you switch
1. Back up the whole site
Files and database, stored somewhere other than your hosting account. If anything goes wrong, a restore is quicker than repairs. Our backup and restore guide shows how.
2. Take an inventory of the old theme
Ten minutes here saves hours later:
- Screenshot key pages on desktop and mobile: home, a post, a page, the contact page, the footer.
- Copy Additional CSS from Appearance › Customize › Additional CSS into a text file.
- Note Customizer settings you changed: logo, colors, header layout, footer text.
- List widgets in each sidebar and footer area, including any text or HTML widget content.
- Search for theme shortcodes. Search your posts and pages for
[followed by the theme’s name or common words such asbutton,tabsorportfolio. A plugin such as String Locator can also search across files. - Find tracking codes. Analytics or advertising scripts pasted into the theme options panel or
functions.phpwill stop running when the theme is switched off. Move them to a plugin or tag manager first. - Check custom post types. If the theme added a Portfolio or Team menu to the dashboard, find out whether the new theme or a plugin can take that content over.
3. Try the new theme on a staging copy
A staging site is a private copy where you can switch, break and fix things without visitors noticing. Many hosts create one with a click, and our staging guide covers the alternatives. If the new theme imports demo content, do that on staging only; demo imports add pages, menus and widgets you then have to clean up. See our demo import guide before you start.
4. Use Live Preview
On the live site, WordPress lets you preview a theme before activating it. Go to Appearance › Themes, click the theme and choose Live Preview:
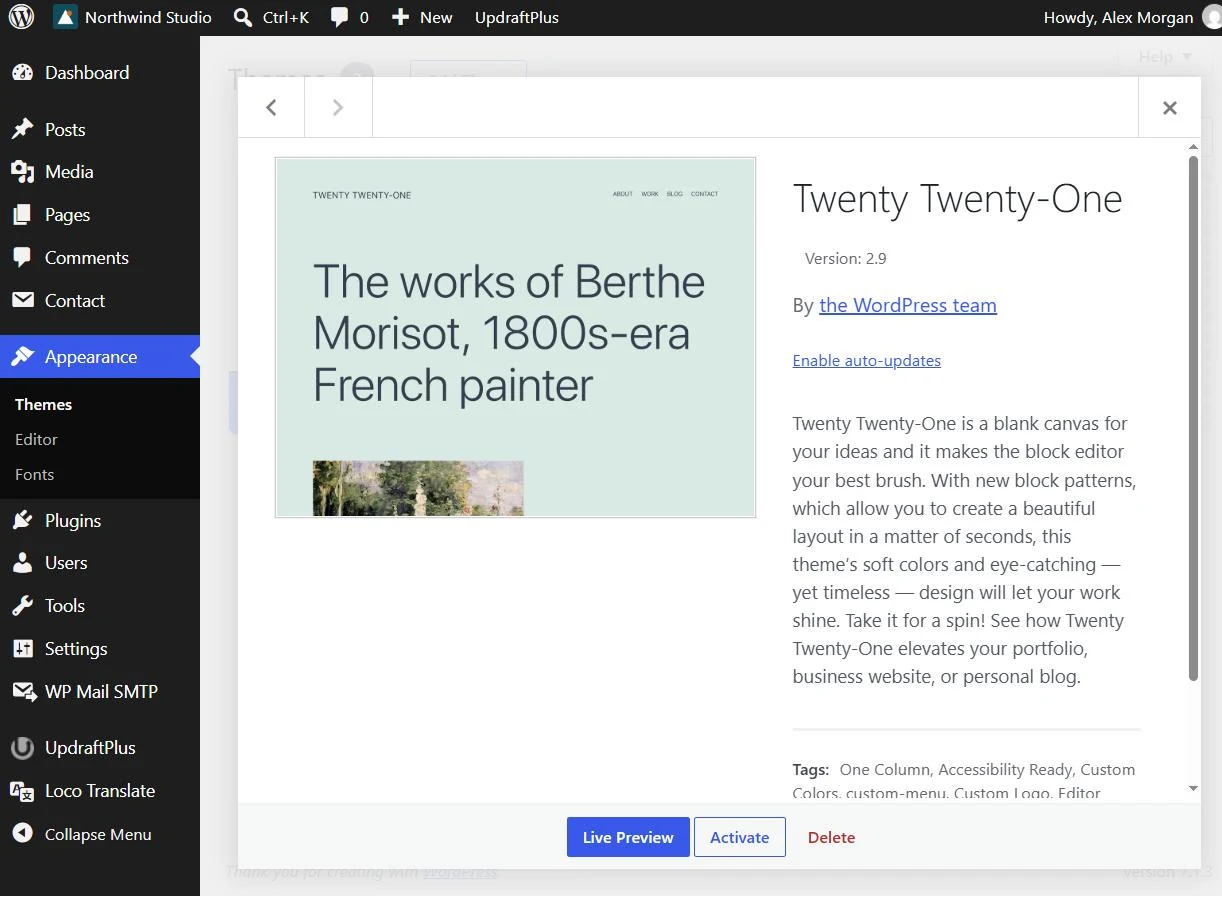
For a classic theme the preview opens in the Customizer; for a block theme it opens in the Site Editor. In both cases visitors keep seeing the current theme until you activate. Live Preview is good for checking the general look, menus and widgets. It doesn’t replace staging for anything involving demo content, page builders or plugins.
Switching
When the staging version looks right:
- Pick a quiet time and make a fresh backup.
- If the new theme is a premium theme, install it with its child theme, and activate the child theme. Our guide to installing a theme without breaking your site covers the upload steps.
- Activate the theme.
- Work through the checklist below straight away.
After you switch: the checklist
- Menus: go to Appearance › Menus (classic) and assign each menu to the new locations, or add the Navigation block to the header (block themes).
- Widgets: check Appearance › Widgets and move anything from Inactive Widgets to the new areas. Block themes don’t use widget areas at all; rebuild sidebars and footers in the Site Editor instead.
- Logo, colors and header: set them again in the new theme’s Customizer or Styles.
- Additional CSS: paste back only what you still need. Much of it was written for the old theme’s HTML and won’t apply.
- Homepage: check that Settings › Reading still points to the right homepage and posts page.
- Shortcodes: open pages that used the old theme’s shortcodes and replace them with blocks or the new theme’s equivalents.
- Featured images: the new theme may use different image sizes. If thumbnails look cropped or blurry, regenerate them with a maintained tool after taking a backup.
- Permalinks: visit Settings › Permalinks and click Save Changes once. This refreshes rewrite rules and fixes most unexpected 404 errors; our 404 troubleshooting guide covers the rest.
- Forms, search and checkout: submit a test form, run a search and, on a shop, place a test order.
- Caches: clear the caching plugin, the server cache and any CDN cache so visitors get the new design.
- Speed and mobile: compare a few pages with your “before” screenshots on a phone.
Keep the old theme for a while
Leave the previous theme installed but inactive for a couple of weeks. If you discover something missing, you can look at its settings or switch back quickly. Once you are sure, delete it: inactive themes still need updates, and unused code is better removed.
Switching between classic and block themes
Moving from a classic theme to a block theme, or the other way round, is closer to a redesign. Widgets, Customizer settings and menus work differently, and headers and footers have to be rebuilt in the new system. Our classic vs block themes guide explains the differences so you can estimate the work before you start.
Quick summary
- Back up.
- Write down everything that belongs to the old theme: settings, CSS, widgets, shortcodes, tracking code.
- Test the new theme on staging, with Live Preview as a second check.
- Switch, then go through menus, widgets, logo, CSS, homepage, permalinks and forms.
- Keep the old theme inactive until you are confident, then delete it.